[태그:] tensorflow

  • docker+tensorflow

    나는 구형 x1055 cpu를 사용하고 있다. 10년 넘어가고 있다. 다행히 6코어라 병렬처리 지원 프로그램은 빠르다. 요즘들어 병렬처리지원 프로그램을 많이 만드는 듯 하다. 아쉽게도 avx 등 명령세트를 지원하지 않는다. 구글이 컴파일한 whl버전을 설치하면 core dumped로 죽는다. 이를 해결하려면 내가 source build를 해야한다. source build하려면 우분투 16.04에 cuda, cudnn, bazel을 설치해야 한다. 얼마? 전 나온 ubuntu 18.04를 쓰고 싶은데, 컴파일할 수 없어 설치하기 꺼려진다. 게다가 conda, 가상화 등이 작업환경을 망치는 기분이다.

    이 중 docker를 알았다. host에 영향주지 않고, 안전하게 tensorflow를 쓸 수 있다. 시험으로 tensorflow 1.10 이미지에 내가 컴파일한 whl을 설치했다. 잘 된다. 이번에 밀어 버렸다.

    여기에 보면 아주 쉽게 build할 수 있다. 그러나 처음 시도한 이미지로 nvidia driver를 올릴 수 없었다. 다음으로 ubuntu 16.04에서 bazel, cuda, cudnn을 차근차근 설치했다. 이 이미지가 build를 못한다. Workspace 에러가 나를 막았다.

    이번에는 bazel 설치 이미지로 찾아 bazel test 했다. tensorflow cpu 컴파일도 Workspace 에러없었다. 컴파일 되는 이미지 dockerfile을 봤다. jdk8 버전에서 bazel을 설치했다.

    FROM openjdk:8
    # Bazel uses jdk8. Importing jdk8 image in advance, docker runs faster.
    # but there are some problem between openjdk8 and Bazel 0.5.3.
    
    MAINTAINER Tadashi KOJIMA <nsplat@gmail.com>
    
    # To install Bazel, see https://docs.bazel.build/versions/master/install-ubuntu.html#install-with-installer-ubuntu
    RUN apt-get update \
    	&& apt-get install -y pkg-config zip g++ zlib1g-dev unzip \
    	&& wget https://github.com/bazelbuild/bazel/releases/download/0.16.1/bazel-0.16.1-installer-linux-x86_64.sh \
    	&& chmod +x ./bazel-0.16.1-installer-linux-x86_64.sh \
    	&& ./bazel-0.16.1-installer-linux-x86_64.sh \
    
    # run bazel test
    	&& ls -l bin/ \
    	&& export PATH="$PATH:/root/bin" \
    	&& echo $PATH \
    	&& which bazel \
    	&& bazel \
    	&& echo "export PATH=\$PATH:/root/bin" >> /root/.bash_profile \
    	&& echo "exec /bin/bash" >> /root/.bash_profile \
    	&& . /root/.bash_profile
    
    # Set up workspace
    WORKDIR /home

    몇 줄 진행(한시간정도?)하다 컴파일 에러났다. 이번에는ubuntu 16.04에서 시작했다. cuda, cudnn, git 필요 모듈을 설치했다. 일단 컴파일은 에러없이 성공했다. 그러나 이 빌드 gpu 버전은 gpu를 동작시키지 않는다. 나중에 중요한 사실을 알았다. 구글이 source build 문서 아래에 검증된 tensorflow, bazel, cuda 버전을 기록했다. 내가 설치한 bazel 버전이 너무 높았다. 진작 알았으면 하루 벌었는데.

    https://www.tensorflow.org/install/source

    마지막으로 1.10-rc2-dev-gpu-py3 docker 이미지를 받아 해봤다. 너무나 쉽게 성공했다. docker 이미지가 한글을 지원하지 않아, 환경변수를 설정했다.

    python에서 한글 터미널 에러

    https://www.44bits.io/ko/post/setup_linux_locale_on_ubuntu_and_debian_container

    이거 한다고 주말을 다 날렸다. 컴파일하는데 약 3시간 걸렸다. 테스트 시간이 많아 확인하기 어려웠다.

  • tensorflow 1.10 설치기

    아나콘다에 tensorflow를 설치하여 사용했다. 그러나 1.6버전 이후로 tensorflow를 import하면 illegal instruction을 내고 죽었다. 혹시나 해결되었는지 1.10으로 업데이트하여 확인했다. 그러나 역시 같은 문제로 1.5로 다시 돌어왔다.

    검색해 보니, 구글이 제공하는 tensorflow binary 1.6이후 파일이 cpu의 AVX를 기본지원한다. 인텔이 2008년 자사 CPU에 AVX 기능을 적용했다. 불행히도 나는 골동품 투반을 사용한다. CPU를 도저히 교체할 상황이 아니라, 힘들게 컴파일 하기로 했다. 담에는 intel cpu를 쓰리라.

    아래 순서로 작업했다.

      1. nvidia 드라이버 설치. 390버전을 ubuntu 16.04가 지원하지 않아 과감히 패스.
      2. cuda 등 설치. 컴파일하면 다양한 버전을 선택할 수 있다.
      3. tensorRT 설치. 컴파일 하기전 선택할 수 있음.
      4. 매뉴얼에 따라 tensorflow 1.10 컴파일.
      5. virtual environment 사용하여 설치. anaconda에 대해 구글이 알아서 해결하라 주의라, 패스.
      6. 가상 환경에서 activate 후, 내가 컴파일한 tensorflow 설치.

    투반이 6개 코어를 100% 가동하여 5,000초 동안 작업했다.ㅠㅠ

  • gtx 1060 6gb+tensorflow gpu 버전 세팅 후기

    gtx 1060 6gb+tensorflow gpu 버전 세팅 후기

    Tensorflow, CUDA toolkit, cuDNN 버전.

    이것 설치한다고 이틀을 날렸다. 메뉴얼을 제대로 안 읽은 내탓도 있지만, Nvidia가 별다를 설명없이 기존 버전을 숨겨버린 탓도 있다. 멀쩡한 OS도 한번 날리고.

    Tensorflow 인스톨 사이트에 아래와 같이 써있다.

    NVIDIA requirements to run TensorFlow with GPU support

    If you are installing TensorFlow with GPU support using one of the mechanisms described in this guide, then the following NVIDIA software must be installed on your system:

    • CUDA® Toolkit 8.0. For details, see NVIDIA’s documentation. Ensure that you append the relevant Cuda pathnames to the LD_LIBRARY_PATH environment variable as described in the NVIDIA documentation.
    • The NVIDIA drivers associated with CUDA Toolkit 8.0.
    • cuDNN v6. For details, see NVIDIA’s documentation. Ensure that you create the CUDA_HOME environment variable as described in the NVIDIA documentation.

    CUDA toolkit : 필히 8.0!! Nvidia 다운로드 사이트에 가면 9.0이 딱 있다. 8.0을 찾을수가 없다. 8.0은 여기에..

    cuDNN도 CUDA toolkit 8.0에 맞는 버전을 설치한다.

    나는 그래픽 드라이버를 384.81 버전을 설치했다. Nvidia 사이트에 최신 드라이버가 있는데, 그 버전 사용하려다 OS를 다시 설치했다. 저장소를 추가하고,  sudo apt-get install 이렇게 쉽게 드라이버를 인스톨하면 된다. CUDA toolkit이 드라이버를 업데이트 한다.

    비교!

    CPU 버전으로 5,000[초/횟수]에 걸쳐하는 작업이, GPU를 사용하면 500[초/횟수]로 0이 하나 줄었다!!


    GPU 선정.

    싼 GTX 1060 6gb를 사기로 했다. 3gb 메모리 제품이 더 싼데, 사용하는데 문제 된다고 한다. 초심자에겐 값싼 gtx 1060이 최고다.

    게다가 PC 케이스가 작아, 1070 이후 제품을 넣으려면 케이스를 뜯어내야 한다. 1060 길이가 260mm인데, 자로 한번 케이스를 재어 보니 좀 여유있게 들어 갈 수 있어 보인다.

    겨우 넣었다. 간섭으로 대각선 삽입!!.

    메인보드
    description: Motherboard
    product: GA-MA785GT-UD3H
    vendor: Gigabyte Technology Co., Ltd.
    pciE 2.0 * 16 지원

    메인보드를 한 8년 사용하는데, pciE 2.0과 3.0 차이가 없다고 보고, 그냥 사용하기로 했다.
    GTX 1060 6gb와 호환 가능

    후기.

    8년전 PC 살 때, 리누스가 Nvidia에 뽀큐를 날렸다는 말을 듣고, AMD 그래픽 카드를 샀는데….AMD 병신 카드였다. 제품을 만들었으면 드라이버도 좀 신경을 써야 하는데, 영 신경을 안쓴다. 윈도우에서도 그닥이고..내 인생에 다시 AMD 제품을 구매할 일이 없다. Gtx 7이나 8시리즈만 되었어도 그냥 썼을텐데..쩝..

    CUDA 9.0 + tensorflow 1.5 + ubuntu 16.04 + kernel 4.13

    망할..tensorflow 1.5로 업그레이드 하고, cuda 9.0을 쓰려니 망했다. cuda 9.0을 설치하니 화면이 나갔다.

    • cuda 9.0은 드라이버 387부터 지원.
    • 커널 4.13에 cuda 9.0을 사용하려면 드라이버 390 이상 필요.

    이 두 개가 문제였다. 4시간의 삽질 끝에, cuda를 network 버전으로 설치해야 한다고 알아냈다.  업그레이드 할 때마다 난리를 쳐야되니. 역시 최신 버전만 지원하는 nvidia..9.1만 보인다고 설치하면 9.0으로 다시 설치해야 한다.

  • 텐서플로우 컴파일 설치하기

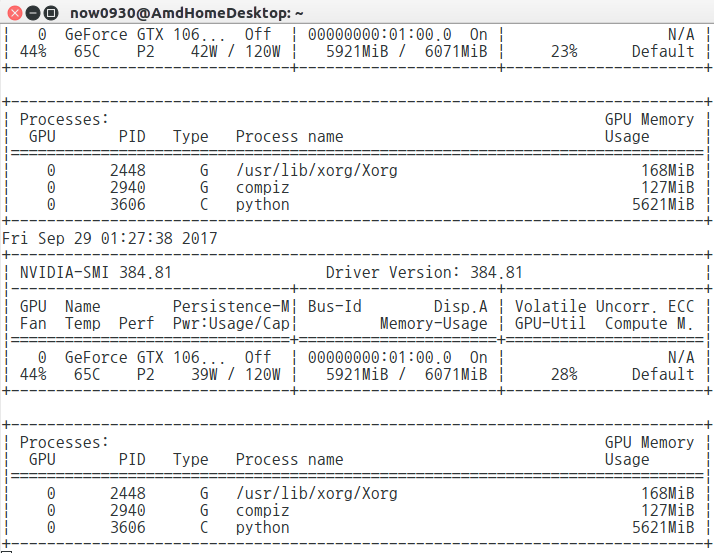
    텐서플로우 GPU 버전을 설치하면 최고인데, CPU 버전만 사용해야 한다. CPU 버전을 쓰면 아래와 같이 메세지가 나온다.

    (tensorflow) now0930@:cifar10$ python cifar10_testv1.py 
    Using TensorFlow backend.
    Couldn't import dot_parser, loading of dot files will not be possible.
    _________________________________________________________________
    Layer (type)                 Output Shape              Param #   
    =================================================================
    conv2d_1 (Conv2D)            (None, 32, 32, 32)        896       
    _________________________________________________________________
    dropout_1 (Dropout)          (None, 32, 32, 32)        0         
    _________________________________________________________________
    conv2d_2 (Conv2D)            (None, 32, 32, 32)        9248      
    _________________________________________________________________
    max_pooling2d_1 (MaxPooling2 (None, 32, 16, 16)        0         
    _________________________________________________________________
    flatten_1 (Flatten)          (None, 8192)              0         
    _________________________________________________________________
    dense_1 (Dense)              (None, 512)               4194816   
    _________________________________________________________________
    dropout_2 (Dropout)          (None, 512)               0         
    _________________________________________________________________
    dense_2 (Dense)              (None, 10)                5130      
    =================================================================
    Total params: 4,210,090
    Trainable params: 4,210,090
    Non-trainable params: 0
    _________________________________________________________________
    None
    Train on 50000 samples, validate on 10000 samples
    Epoch 1/25
    2017-06-17 08:55:41.662236: W tensorflow/core/platform/cpu_feature_guard.cc:45] The TensorFlow library wasn't compiled to use SSE4.1 instructions, but these are available on your machine and could speed up CPU computations.
    2017-06-17 08:55:41.663359: W tensorflow/core/platform/cpu_feature_guard.cc:45] The TensorFlow library wasn't compiled to use SSE4.2 instructions, but these are available on your machine and could speed up CPU computations.
    2017-06-17 08:55:41.663384: W tensorflow/core/platform/cpu_feature_guard.cc:45] The TensorFlow library wasn't compiled to use AVX instructions, but these are available on your machine and could speed up CPU computations.
      288/50000 [..............................] - ETA: 707s - loss: 2.3271 - acc: 0.1076

    연산 시간이 CPU 최신 기술로 줄어든다는데, 전에 해보렸으나 적당한 tutorial이 없어 못했다. 그러던 중, 아래 사이트를 찾았다.
    텐서플로우, 직접 소스코드 빌디하여 설치하기

    정리하면..

    1. Git에서 clone으로 다운로드
      $ git clone https://github.com/tensorflow/tensorflow
      $ cd tensorflow
      $ git checkout r1.2  #r은 release..적용 버전이 1.2
    2. tensorflow을 컴파일하기 위한 Bazel 설치
      세가지 방법으로 Bazel 설치 가능하다. 나는 debian을 사용하므로, compile 했다.

      1. Install required Package
        apt-get install pkg-config zip g++ zlib1g-dev unzip
      2. Download..
      3. 실행 권한을 주고 run
      4. bazel 경로를 PATH 변수에 추가
        export PATH="$PATH:$HOME/bin"
    3. tensorflow 컴파일 옵션 설정..configure..
      #아까 다운로드 받은 tensorflow 디렉토리에서..
      ./configure
    4. Bazel로 빌드하기
      bazel build --config=opt //tensorflow/tools/pip_package:build_pip_package

      –config=opt 옵션이 아까 경고 부분을 해결한다.

    5. Pip 설치용 whl 만들기
      $./bazel-bin/tensorflow/tools/pip_package/build_pip_package /tmp/tensorflow_pkg

      bazel-bin이 링크다. 경로를 잘 확인한다. 패키지 파일을 /tmp 디렉토리에 넣어야 되는지 모르겠다.

    6. conda 가상 환경 활성화..
    7. 기존 tensorflow 설치버전 무시하고 설치
      (tensorflow)$ pip install --ignore-installed --upgrade tfBinaryURL

      tfBinaryURL이 아까 만든 /tmp/tensorflow_pkg의 whl 경로이다.

    설치 후, python을 다시 실행하면 해당 메세지가 없어졌다.

    (tensorflow) now0930@:cifar10$ python cifar10_testv1.py 
    Using TensorFlow backend.
    Couldn't import dot_parser, loading of dot files will not be possible.
    _________________________________________________________________
    Layer (type)                 Output Shape              Param #   
    =================================================================
    conv2d_1 (Conv2D)            (None, 32, 32, 32)        896       
    _________________________________________________________________
    dropout_1 (Dropout)          (None, 32, 32, 32)        0         
    _________________________________________________________________
    conv2d_2 (Conv2D)            (None, 32, 32, 32)        9248      
    _________________________________________________________________
    max_pooling2d_1 (MaxPooling2 (None, 32, 16, 16)        0         
    _________________________________________________________________
    flatten_1 (Flatten)          (None, 8192)              0         
    _________________________________________________________________
    dense_1 (Dense)              (None, 512)               4194816   
    _________________________________________________________________
    dropout_2 (Dropout)          (None, 512)               0         
    _________________________________________________________________
    dense_2 (Dense)              (None, 10)                5130      
    =================================================================
    Total params: 4,210,090
    Trainable params: 4,210,090
    Non-trainable params: 0
    _________________________________________________________________
    None
    Train on 50000 samples, validate on 10000 samples
    Epoch 1/25
    

    설치하기 전에는 속도가 많이 빨라질 것이라 기대 했으나..별 차이 없어보인다.

  • 인구 데이터로 년 수입 예측, 2차

    인구 데이터로 년 수입 예측, 2차

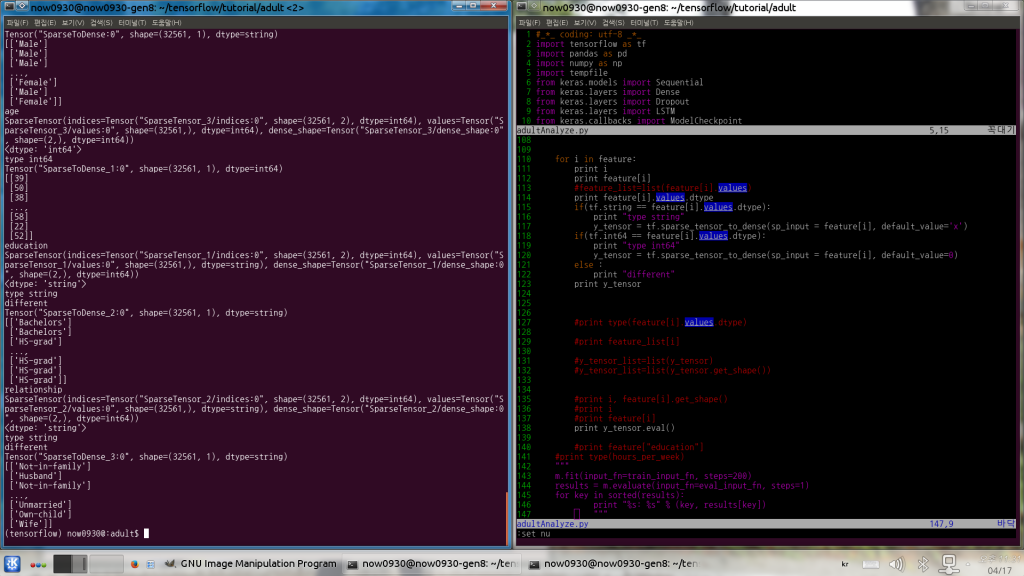
    sparse_tensor_to_dense

    전에 이어서…
    각 행의 feature를 sparse tensor로 받아 들인다. tutorial에는 값을 확인하는 부분이 없다. 내가 입력한 값이 정확한지 이를 어떻게 확인해야 하는지? print로 확인을 하면 좋은데, sparse tensor를 print 하면 대략 형식에 대한 값들만 출력이 된다.

    SparseTensor(indices=Tensor("SparseTensor_1/indices:0", shape=(32561, 2), dtype=int64), values=Tensor("SparseTensor_1/values:0", shape=(32561,), dtype=string), dense_shape=Tensor("SparseTensor_1/dense_shape:0", shape=(2,), dtype=int64))
    

    크게 3개로 구성된다. 각 항목의 type은 tensor이다.
    1. indeces에 대한 정의
    2. values에 대한 정의
    3. dense_shape에 대한 정의

    sparse_tensor_to_dense 함수가 sparse tensor를 어떻게 되어있는지 출력한다. sparse_tensor_to_dense의 입력 파라미터로 1. sparse tensor 이름, 2.default_value를 받는다. feature column으로 만든 sparse tensor는 values에 대한 data type이 string, int64 등 여러 종류가 있다. 정의된 values가 int64인데 default_value를 string을 쓰면 에러가 난다. 그래서 각 sparse tensor의 values에 대한 항목을 뽑고, 다시 dtype을 뽑아내어 각 항목에 맞는 default_value를 넣어버렸다.
    아래와 같이 구현했다.

    with tf.Session() as sess:
    
        for i in feature:
            print i
            print feature[i]
            print feature[i].values.dtype
            if(tf.string == feature[i].values.dtype):
                print "type string"
                y_tensor = tf.sparse_tensor_to_dense(sp_input = feature[i], default_value='x')
            if(tf.int64 == feature[i].values.dtype):
                print "type int64"
                y_tensor = tf.sparse_tensor_to_dense(sp_input = feature[i], default_value=0)
            else :
                print "different"
            print y_tensor
            print y_tensor.eval()
    

    이렇게 실행하면 아래의 결과를 얻는다.

    gender
    SparseTensor(indices=Tensor("SparseTensor/indices:0", shape=(32561, 2), dtype=int64), values=Tensor("SparseTensor/values:0", shape=(32561,), dtype=string), dense_shape=Tensor("SparseTensor/dense_shape:0", shape=(2,), dtype=int64))
    <dtype: 'string'>
    type string
    different
    Tensor("SparseToDense:0", shape=(32561, 1), dtype=string)
    [['Male']
     ['Male']
     ['Male']
     ..., 
     ['Female']
     ['Male']
     ['Female']]
    age
    SparseTensor(indices=Tensor("SparseTensor_3/indices:0", shape=(32561, 2), dtype=int64), values=Tensor("SparseTensor_3/values:0", shape=(32561,), dtype=int64), dense_shape=Tensor("SparseTensor_3/dense_shape:0", shape=(2,), dtype=int64))
    <dtype: 'int64'>
    type int64
    Tensor("SparseToDense_1:0", shape=(32561, 1), dtype=int64)
    [[39]
     [50]
     [38]
     ..., 
     [58]
     [22]
     [52]]
    education
    SparseTensor(indices=Tensor("SparseTensor_1/indices:0", shape=(32561, 2), dtype=int64), values=Tensor("SparseTensor_1/values:0", shape=(32561,), dtype=string), dense_shape=Tensor("SparseTensor_1/dense_shape:0", shape=(2,), dtype=int64))
    <dtype: 'string'>
    type string
    different
    Tensor("SparseToDense_2:0", shape=(32561, 1), dtype=string)
    [['Bachelors']
     ['Bachelors']
     ['HS-grad']
     ..., 
     ['HS-grad']
     ['HS-grad']
     ['HS-grad']]
    relationship
    SparseTensor(indices=Tensor("SparseTensor_2/indices:0", shape=(32561, 2), dtype=int64), values=Tensor("SparseTensor_2/values:0", shape=(32561,), dtype=string), dense_shape=Tensor("SparseTensor_2/dense_shape:0", shape=(2,), dtype=int64))
    <dtype: 'string'>
    type string
    different
    Tensor("SparseToDense_3:0", shape=(32561, 1), dtype=string)
    [['Not-in-family']
     ['Husband']
     ['Not-in-family']
     ..., 
     ['Unmarried']
     ['Own-child']
     ['Wife']]